How to Make Neapolitan Cake at Home
If you’re craving something sweet, colorful, and delightfully nostalgic, then this Neapolitan Cake recipe is going to be your new kitchen favorite. Packed with three distinct flavors—chocolate, strawberry, and vanilla—this cake captures that classic ice cream trio in a soft, spongy, and creamy form. Perfect for celebrations, family gatherings, or simply a treat-yourself moment, this recipe shows you exactly how to make Neapolitan Cake with simple ingredients you already love, baking it all together into a charming, irresistible dessert right at home.
Why You’ll Love This Recipe
- Triple Flavor Delight: Combines chocolate, strawberry, and vanilla in one gorgeous cake that everyone will enjoy.
- Simple Ingredients: Uses common pantry staples with easy swaps for a hassle-free bake.
- Showstopping Presentation: The neat, layered colors make it perfect for parties or special occasions.
- Customizable Layers: You can easily adjust flavors and fillings to suit your mood or diet.
- Perfect for Beginners: Straightforward steps with clear instructions make baking this cake beginner-friendly.
Ingredients You’ll Need
All you need for this Neapolitan Cake are ingredients that bring out vibrant flavor and soft texture. Each component works in harmony to create the perfect balance between taste, color, and moistness, making the cake a true showstopper.
- All-Purpose Flour: Provides the structure for a light, fluffy cake base perfect for layered stacking.
- Sugar: Sweetens the cake and helps form a tender crumb.
- Baking Powder: Gives the lift and fluffiness that makes each layer so soft.
- Butter: Adds richness and moisture, creating a creamy texture in every bite.
- Milk: Keeps the batter smooth and moist while blending flavors perfectly.
- Eggs: Essential for binding the batter and adding lightness to the sponge.
- Vanilla Extract: Enhances the vanilla layer with a warm, sweet aroma.
- Cocoa Powder: Delivers rich chocolate flavor and a beautiful dark layer.
- Strawberry Extract or Puree: Provides the fruity pink layer that’s refreshing and natural.
- Whipped Cream or Buttercream: Used for frosting and layering, adding a silky finishing touch.
Variations for Neapolitan Cake
This Neapolitan Cake is wonderfully versatile, so feel free to experiment based on your pantry, taste preferences, or dietary requirements. Here are some creative twists to try when you want to shake things up.
- Dairy-Free Option: Swap butter and milk for coconut oil and almond or oat milk for a vegan-friendly cake.
- Fruit Infusions: Enhance the strawberry layer by blending fresh strawberries or adding raspberries for tartness.
- Chocolate Ganache: Replace whipped cream with a silky chocolate ganache for a richer finish.
- Gluten-Free: Use a gluten-free flour blend to accommodate gluten sensitivities without sacrificing texture.
- Alcohol Twist: Add a splash of rum or Amaretto to the batter for an adult-friendly cake with extra depth.

How to Make Neapolitan Cake
Step 1: Prepare the Batter
Start by sifting together the flour and baking powder to ensure an even rise. Cream the butter and sugar until light and fluffy, then beat in eggs one at a time. Gradually add the dry ingredients and milk alternately, mixing gently until you have a smooth batter.
Step 2: Divide and Flavor
Separate the batter evenly into three bowls. Add the cocoa powder to one bowl for the chocolate layer, strawberry extract or puree to the second bowl for the strawberry layer, and vanilla extract to the third bowl for the vanilla layer. Stir each until the color and flavor are well blended.
Step 3: Bake the Layers
Grease and line three cake pans of the same size for even layers. Pour each batter into its own pan and spread evenly. Bake in a preheated oven at 350°F (175°C) for about 20-25 minutes or until a toothpick inserted comes out clean. Let layers cool completely before assembly.
Step 4: Assemble and Frost
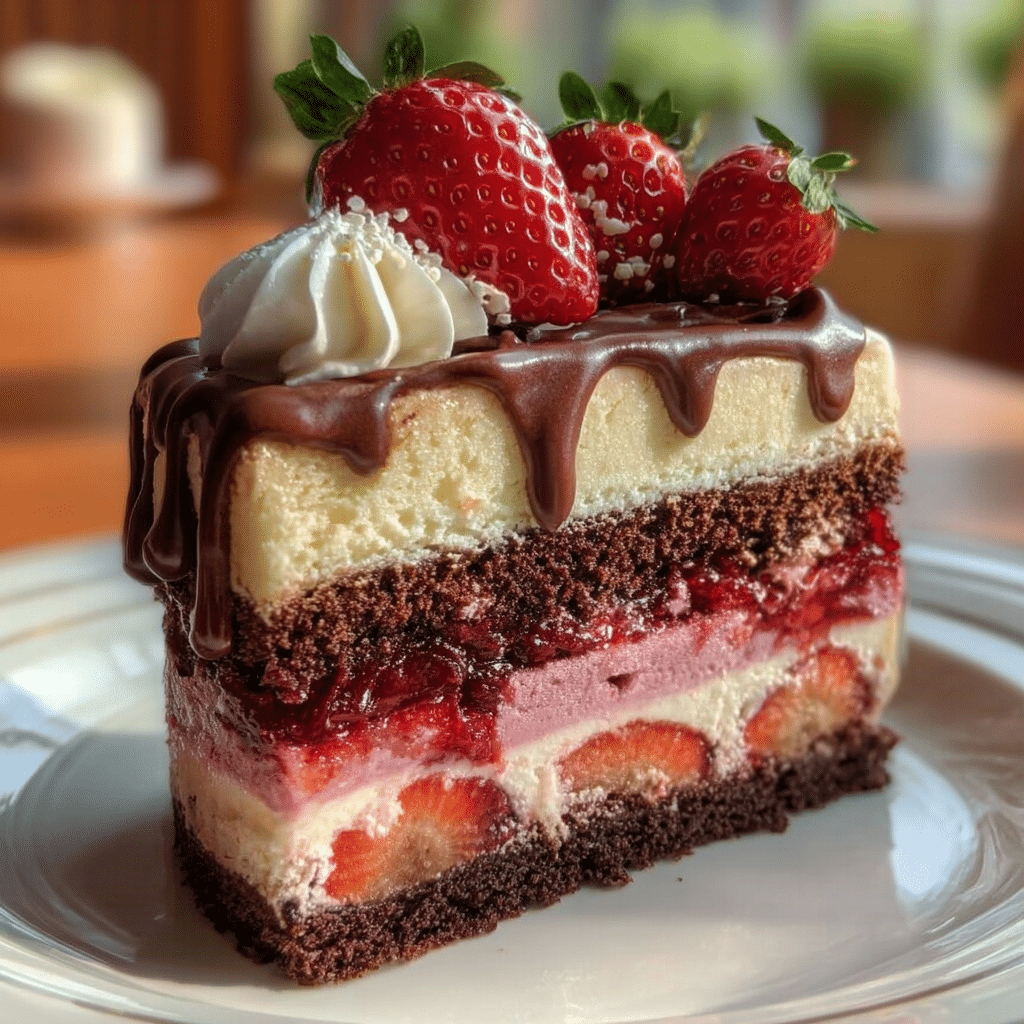
Once cooled, place the chocolate layer on your serving plate. Spread a generous layer of whipped cream or buttercream frosting on top. Add the strawberry layer next and repeat the frosting process. Finish with the vanilla layer and cover the entire cake with the remaining frosting for a smooth, beautiful finish.
Step 5: Chill and Serve
To enhance the flavor melding and firm up the frosting, chill the Neapolitan Cake for at least an hour before serving. This step results in cleaner slices and a more refreshing experience.
Pro Tips for Making Neapolitan Cake
- Even Layers: Use identical pans and weigh batter portions to ensure each layer is the same thickness.
- Cool Completely: Always let cake layers cool fully before frosting to avoid melting or sliding icing.
- Flavor Boost: Enhance extracts with fresh berries or high-quality cocoa for a richer taste.
- Chill Batter: For cleaner layers, chill colored batters briefly before baking to reduce blending.
- Room Temperature Ingredients: Use eggs and butter at room temperature for better mixing and texture.
How to Serve Neapolitan Cake
Garnishes
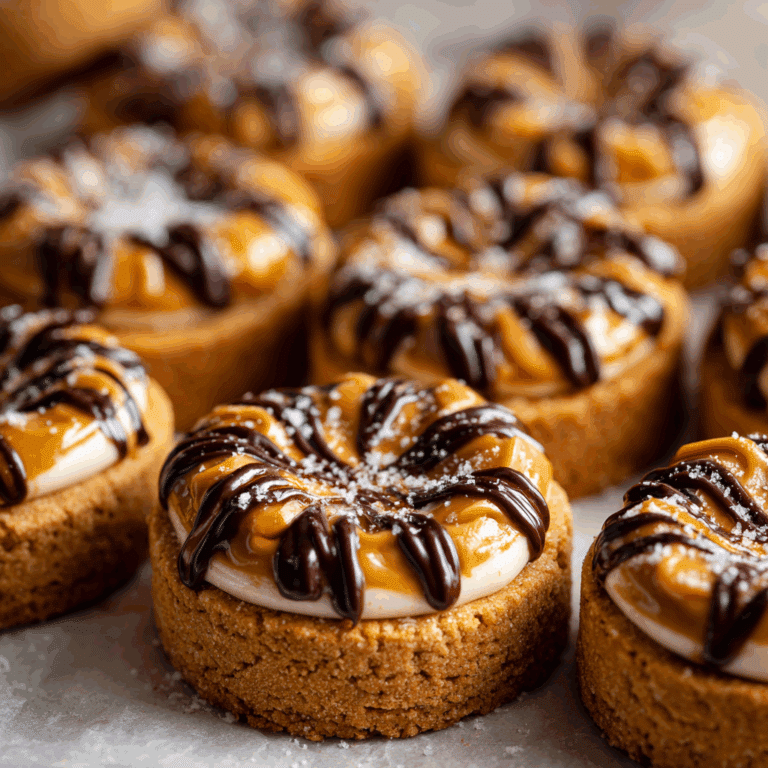
Top your Neapolitan Cake with fresh strawberries, chocolate shavings, or a sprinkle of powdered sugar for extra visual and flavor appeal. These straightforward touches complement the layers beautifully without overpowering the classic taste.
Side Dishes
Pair this cake with lightly whipped cream, a scoop of vanilla ice cream, or a fresh berry compote to complement the flavors and enhance the dessert experience further.
Creative Ways to Present
Serve slices layered on colorful dessert plates to highlight the pink, white, and brown hues. Alternatively, create mini Neapolitan cupcakes for individual servings at parties or drizzle chocolate sauce around the plate for an elegant touch.
Make Ahead and Storage
Storing Leftovers
Keep your leftover Neapolitan Cake covered in the fridge to maintain freshness for up to four days. Using an airtight container or cake dome helps protect the frosting and prevents the cake from absorbing other odors.
Freezing
You can freeze the cake either assembled or unassembled. Wrap each layer tightly in plastic wrap and aluminum foil for extended storage, up to two months. Thaw overnight in the fridge before assembling and frosting.
Reheating
Since this cake is best served chilled, reheating isn’t necessary. If you prefer it slightly warmer, allow the slice to sit at room temperature for 15-20 minutes before enjoying.
FAQs
Can I use fresh strawberries instead of extract?
Absolutely! Fresh strawberries or strawberry puree can add a natural, vibrant flavor to the pink layer; just reduce any added liquid in the batter to maintain consistency.
Is this cake suitable for children?
Yes, Neapolitan Cake is a child-friendly dessert with familiar flavors and ingredients, perfect for birthday parties and celebrations.
Can I make this cake gluten-free?
Yes! Use a high-quality gluten-free flour blend instead of all-purpose flour, and ensure your baking powder is gluten-free for the best results.
How do I prevent the colors from mixing?
Chill the colored batters for about 10 minutes before baking and handle layers gently when stacking to keep the distinct colors vibrant and separated.
Can I use jam instead of frosting between layers?
Jam is a delicious alternative to frosting for a lighter option; brush a thin layer between the sponge cakes and follow with a light dusting of powdered sugar on top.
Final Thoughts
Making Neapolitan Cake at home is a joyful and rewarding experience that brings back the comforting nostalgia of your favorite ice cream trio with a fresh, baked twist. This recipe’s approachable ingredients and clear steps make it the perfect project, whether you’re a baking newbie or a seasoned pro. Give it a try and watch the smiles multiply as you share this colorful and delicious cake with your loved ones.
Related Posts
- Why Cinnamon Sugar Biscuit Bites Are Irresistible
- Why Mississippi Mud Cake Is a Must-Try Dessert
- How to Make Irresistible Strawberry Lemon Blondies
Neapolitan Cake

This Neapolitan Cake recipe is a delightful and nostalgic dessert featuring three distinct layers of chocolate, strawberry, and vanilla flavors. Soft, spongy, and creamy, it captures the classic ice cream trio in a beautiful layered cake perfect for celebrations, family gatherings, or special treat-yourself moments. Made with simple pantry staples and easy-to-follow steps, this cake offers a colorful showstopping presentation and is customizable to suit various tastes and dietary needs.
- Prep Time: 20 minutes
- Cook Time: 25 minutes
- Total Time: 1 hour 45 minutes
- Yield: 12 servings 1x
- Category: Desserts
- Method: Baking
- Cuisine: American
- Diet: Gluten Free (with gluten-free flour blend substitution)
Ingredients
Dry Ingredients
- 2 ½ cups all-purpose flour (or gluten-free flour blend for gluten-free option)
- 2 ½ teaspoons baking powder (ensure gluten-free if needed)
- 1 cup sugar
- 2 tablespoons cocoa powder
Wet Ingredients
- 1 cup unsalted butter, softened (or coconut oil for dairy-free option)
- 1 cup milk (or almond/oat milk for dairy-free option)
- 4 large eggs, at room temperature
- 1 teaspoon vanilla extract
- 1 teaspoon strawberry extract or ¼ cup strawberry puree
Frosting
- Whipped cream or buttercream frosting (or chocolate ganache as an alternative)
Instructions
- Prepare the Batter: Sift together the all-purpose flour (or gluten-free blend) and baking powder to ensure an even rise. In a separate bowl, cream the softened butter and sugar until light and fluffy. Beat in the eggs one at a time, mixing well after each addition. Gradually add the dry ingredients alternately with milk, mixing gently until you have a smooth batter.
- Divide and Flavor: Evenly separate the batter into three bowls. To the first bowl, add cocoa powder for the chocolate layer and stir until combined. Add strawberry extract or puree to the second bowl for the strawberry layer, mixing well. Add vanilla extract to the third bowl for the vanilla layer and stir gently until smooth and evenly colored.
- Bake the Layers: Preheat the oven to 350°F (175°C). Grease and line three identical cake pans. Pour each flavored batter into its own pan, spreading evenly. Bake for 20-25 minutes or until a toothpick inserted in the center comes out clean. Remove from oven and allow layers to cool completely before assembling.
- Assemble and Frost: Place the cooled chocolate cake layer on a serving plate. Spread a generous layer of whipped cream or buttercream frosting over the top. Add the strawberry layer and repeat with frosting. Finish by placing the vanilla layer on top and cover the entire cake with the remaining frosting for a smooth and attractive finish.
- Chill and Serve: Refrigerate the assembled cake for at least one hour to firm up the frosting and allow flavors to meld. This will help achieve clean slices and enhance the dessert’s refreshing taste. Garnish as desired and serve chilled.
Notes
- Use identical pans and weigh batter portions to ensure even layer thickness.
- Allow cake layers to cool completely before frosting to prevent melting or sliding icing.
- Enhance extracts with fresh berries or high-quality cocoa powder for richer flavor.
- Chilling the colored batters briefly before baking can help keep layers distinct.
- For best texture, use eggs and butter at room temperature.
- Jam can be used as a lighter alternative to frosting between layers.
- Store leftover cake covered in an airtight container in the fridge for up to 4 days.
- Freeze layers wrapped tightly to extend storage to 2 months; thaw overnight in fridge before assembling.
- Best served chilled; if preferred warm, bring to room temperature for 15-20 minutes before serving.
Nutrition
- Serving Size: 1 slice (1/12 of cake)
- Calories: 350 kcal
- Sugar: 28 g
- Sodium: 150 mg
- Fat: 18 g
- Saturated Fat: 10 g
- Unsaturated Fat: 6 g
- Trans Fat: 0.5 g
- Carbohydrates: 42 g
- Fiber: 2 g
- Protein: 5 g
- Cholesterol: 80 mg
Keywords: Neapolitan cake, layered cake, chocolate cake, strawberry cake, vanilla cake, easy dessert, gluten-free cake, party cake, homemade cake