Easy Easter Bunny Coconut Tails Recipe to Try
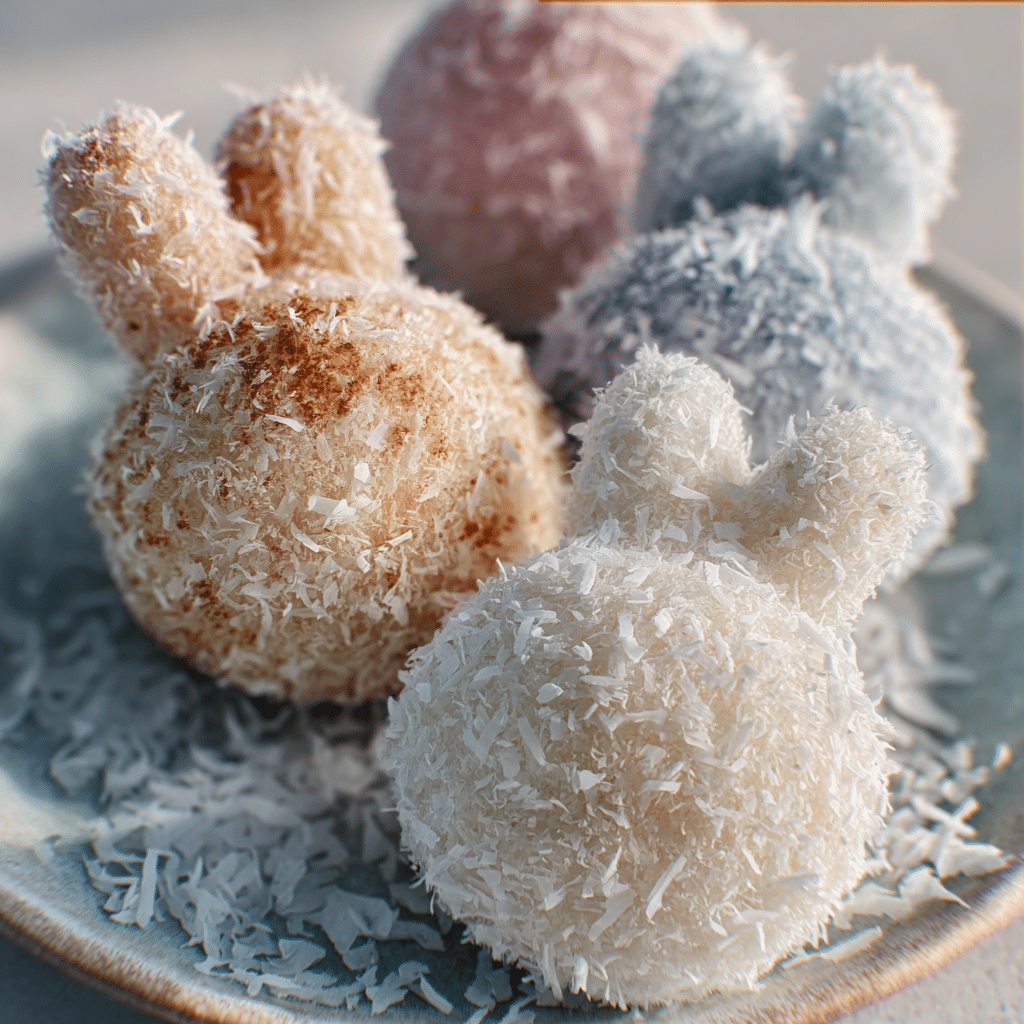
If you’re looking for a delightful, festive treat this season, the Easter Bunny Coconut Tails are exactly what you need. This simple, tasty recipe blends fluffy coconut with creamy sweetness to create bite-sized goodies that capture the joyful spirit of Easter. These coconut tails are not only fun to make but perfect for sharing with family, friends, or even as charming additions to your holiday dessert table.
Why You’ll Love This Recipe
- Simple Ingredients: Uses minimal, easy-to-find ingredients for a fuss-free baking experience.
- Delicious Texture: Combines soft coconut flakes with a smooth, creamy base for the perfect mouthfeel.
- Perfect for Easter: Fun shapes and festive appearance that make them ideal for holiday celebrations.
- Customizable: Easy to tweak flavors and add-ins to suit your taste or dietary preferences.
- No-Bake Option: Many versions don’t require an oven, saving time and energy.
Ingredients You’ll Need
This Easter Bunny Coconut Tails recipe shines through its straightforward, wholesome ingredients. Each element contributes a layer of flavor, texture, or color that brings these treats to life.
- Sweetened shredded coconut: Provides the signature chewy texture and tropical flavor.
- Condensed milk: Acts as the sweet, creamy binder holding ingredients together perfectly.
- Vanilla extract: Adds depth and warmth to the flavor profile.
- White chocolate chips or melting wafers: Great for coating or drizzling over the coconut tails for extra sweetness and shine.
- Food coloring (optional): Helps decorate and give your Easter Bunny Coconut Tails vibrant touches, making them visually festive.
- Mini candy pieces or edible eyes: Excellent for adding personality to your bunny tails.
Variations for Easter Bunny Coconut Tails
Feel free to make this recipe your own! These variations are easy to incorporate, so whether you have specific dietary needs or just want to experiment, there’s something here for everyone.
- Chocolate Coconut Tails: Mix in cocoa powder or dip the final tails in melted dark chocolate for a rich chocolate twist.
- Vegan Version: Substitute condensed milk with sweetened coconut cream and use dairy-free chocolate chips.
- Nutty Add-Ins: Toss in chopped almonds or pistachios for crunch and nutty flavor.
- Fruit Flavored: Add finely chopped dried strawberries or pineapple bits for a fruity surprise.
- Spiced Edition: Incorporate cinnamon or nutmeg for a warm, cozy note perfect for springtime celebrations.

How to Make Easter Bunny Coconut Tails
Step 1: Prepare the Coconut Mixture
In a mixing bowl, combine the shredded coconut with the condensed milk and vanilla extract. Stir until the coconut is fully coated and the mixture becomes thick and sticky, the perfect base to form your tails.
Step 2: Shape the Tails
Using your hands or a small spoon, shape the coconut mixture into small, tapered ovals that resemble bunny tails. Place them on parchment-lined trays to keep them from sticking.
Step 3: Chill the Coconut Tails
Refrigerate the shaped tails for about 30 minutes to firm up, making them easier to decorate and handle in the next steps.
Step 4: Coat or Decorate
Melt white chocolate chips or melting wafers in a microwave or double boiler. Dip each coconut tail halfway or drizzle with chocolate, then add mini candy pieces or edible eyes while still wet for a fun touch.
Step 5: Final Chill and Serve
Return the decorated coconut tails to the fridge to set the chocolate coating completely, then enjoy the delightful festive snack!
Pro Tips for Making Easter Bunny Coconut Tails
- Choose fresh coconut: Freshly shredded coconut will give you the best flavor and texture.
- Use chilled hands: Wet or chilled hands prevent sticking when shaping the tails.
- Don’t overdo chocolate: A light coating enhances flavor without overshadowing the coconut.
- Prepare decorations in advance: Edible eyes and candy pieces should be ready before coating starts to ensure smooth decorating.
- Store properly: Keep the tails refrigerated until serving to maintain freshness and texture.
How to Serve Easter Bunny Coconut Tails
Garnishes
Add a whimsical touch with pastel-colored sprinkles, edible glitter, or a light dusting of powdered sugar to evoke the Easter spirit perfectly.
Side Dishes
Pair these sweet coconut tails with fresh fruit platters, hot cocoa, or even light lemonade to balance their rich sweetness for a well-rounded holiday treat time.
Creative Ways to Present
Arrange the Easter Bunny Coconut Tails on a festive platter with edible flower petals or nestle them in mini paper cupcake liners shaped like Easter baskets for a charming presentation.
Make Ahead and Storage
Storing Leftovers
Leftover Easter Bunny Coconut Tails keep well stored in an airtight container in the refrigerator for up to five days, maintaining their delicious texture and freshness.
Freezing
You can freeze the tails by placing them in a single layer on a baking sheet, freezing solid, then transferring to a freezer-safe container for up to one month. Thaw in the refrigerator before serving.
Reheating
Since these treats are best enjoyed chilled, avoid reheating—simply bring them to room temperature if you prefer softer texture before serving.
FAQs
Can I use unsweetened coconut for this recipe?
Yes, but you might want to add a bit more sweetened condensed milk to balance out the flavor since unsweetened coconut adds less sweetness.
Are Easter Bunny Coconut Tails gluten-free?
Absolutely! The recipe uses naturally gluten-free ingredients, making these treats a safe and tasty choice for gluten-sensitive guests.
Can I make this recipe nut-free?
Yes! The basic recipe does not include nuts, but always check your ingredients, especially if you add any optional nuts as variations.
How long does it take to prepare Easter Bunny Coconut Tails?
From mixing to chilling and decorating, you’ll spend about 45 minutes to an hour making these delicious treats, with some of that time unsupervised during refrigeration.
What’s the best way to shape the coconut tails?
Wet your hands slightly or chill them before shaping; this will prevent the sticky mixture from clinging to your fingers and make forming the tails easier.
Final Thoughts
There’s something truly special about making and sharing these Easter Bunny Coconut Tails. Their delightful sweetness and festive appearance are sure to bring smiles to your holiday celebrations. Whether you’re new to coconut treats or a seasoned fan looking for a fresh twist, this recipe is an absolute win to try this Easter season!
Related Posts
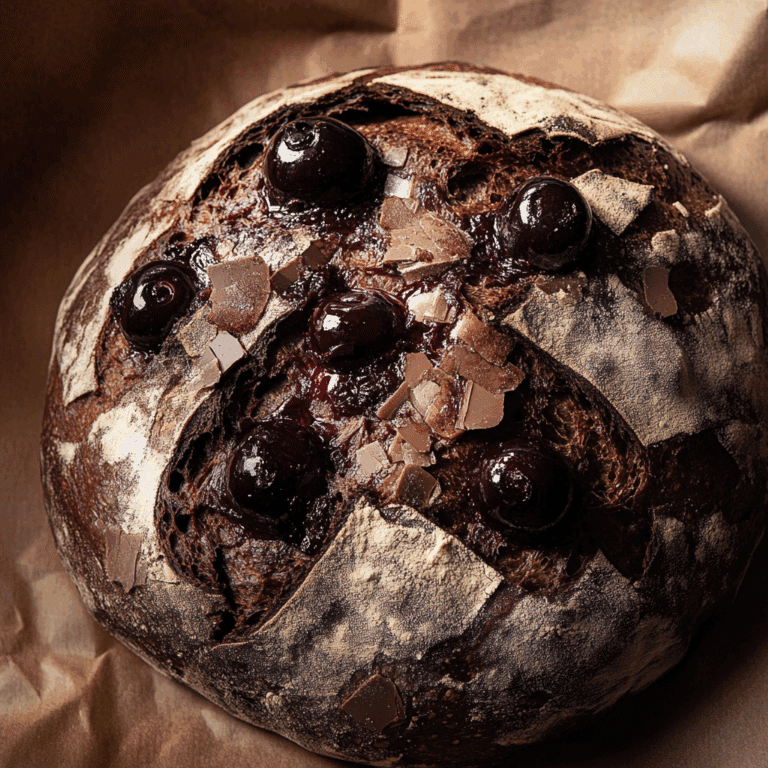
- Easy Almond Cherry Bread Recipe to Savor Today
- Why Chocolate Cherry Sourdough Bread Wins Hearts
- Best Italian Easter Cookies to Bake This Spring
Easter Bunny Coconut Tails

Easter Bunny Coconut Tails are delightful no-bake treats blending sweetened shredded coconut with creamy condensed milk and vanilla. Perfectly shaped and decorated to evoke the joyful spirit of Easter, these bite-sized coconut goodies are simple to make, customizable, and ideal for sharing during holiday celebrations.
- Prep Time: 15 minutes
- Cook Time: 0 minutes
- Total Time: 45 minutes
- Yield: 20-24 coconut tails 1x
- Category: Appetizers
- Method: No-Bake
- Cuisine: American
- Diet: Gluten Free
Ingredients
Main Ingredients
- 2 cups sweetened shredded coconut
- 1/2 cup condensed milk
- 1 teaspoon vanilla extract
For Coating and Decoration
- 1/2 cup white chocolate chips or melting wafers
- Food coloring (optional, for decorating)
- Mini candy pieces or edible eyes (for decorating)
Instructions
- Prepare the Coconut Mixture: In a mixing bowl, combine the shredded coconut with condensed milk and vanilla extract. Stir thoroughly until the coconut is fully coated and the mixture is thick and sticky, forming a perfect base to shape the tails.
- Shape the Tails: Using your hands or a small spoon, form the coconut mixture into small, tapered oval shapes resembling bunny tails. Place the shaped tails on parchment-lined trays to prevent sticking.
- Chill the Coconut Tails: Refrigerate the shaped tails for about 30 minutes to firm them up, making decorating and handling easier.
- Coat or Decorate: Melt white chocolate chips or melting wafers using a microwave or double boiler. Dip each coconut tail halfway or drizzle chocolate over them, then immediately add mini candy pieces or edible eyes while the coating is still wet for a fun festive touch.
- Final Chill and Serve: Return the decorated coconut tails to the fridge to allow the chocolate to fully set. Once set, serve and enjoy these delightful Easter treats.
Notes
- Choose freshly shredded coconut for the best flavor and texture.
- Wet or chill your hands before shaping to prevent sticking.
- Use a light chocolate coating to enhance without overpowering the coconut flavor.
- Prepare decorations in advance for smooth and easy decorating.
- Store the coconut tails refrigerated until serving to maintain freshness and texture.
Nutrition
- Serving Size: 1 tail
- Calories: 110
- Sugar: 12g
- Sodium: 15mg
- Fat: 6g
- Saturated Fat: 5g
- Unsaturated Fat: 1g
- Trans Fat: 0g
- Carbohydrates: 13g
- Fiber: 1g
- Protein: 1g
- Cholesterol: 5mg
Keywords: Easter treats, coconut recipe, no-bake desserts, holiday snacks, gluten-free Easter, festive sweets, bunny tails